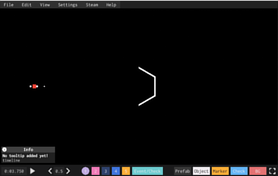
Editor
Proofreading needed
This article needs to be proofread to improve its quality, grammar, and layout. Reason: Update appropriately to reflect editor-alpha branch, rewrite entire page for formatting
The Level Editor is the feature used to create and upload custom levels. It is accessed by selecting the “editor” button on the main menu.
Timeline
The timeline is at the bottom of the editor. Objects can be placed and edited through the timeline.
Bins and Layers
The timeline consists of 15 bins, which are lines on which objects can be placed. There are also 5 layers, or sets of bins, that can be selected between. What bin or layer an object is on has no affect on how it exists in the level, this feature is mainly for organization purposes.
The Scrubber
The timeline scrubber is used t+o view a specific time in the level. It is visible as a blue line with a square on top. It can be moved by dragging it at the top of the editor. The timer at the top of the timeline is where the scrubber currently is. If you are selecting an object and the scrubber is within the time the object is alive, then the scrubber will appear in the object keyframe timeline.
Markers
Markers are features of the editor that allow a time to be marked in the timeline. Markers are visible on the timeline as a white line with a circle on top. Pressing the 'marker' button will create a marker at the point the scrubber is at, and selecting a marker by clicking the circle on top will bring up a menu where the marker can be edited. In the marker editing menu, the marker's name, time, and color can be changed. Markers have no effect on the level.
Preview Window
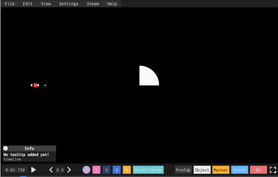
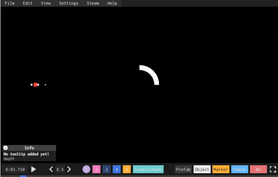
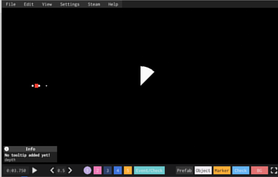
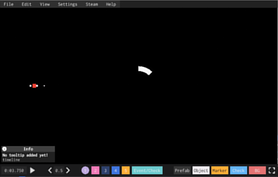
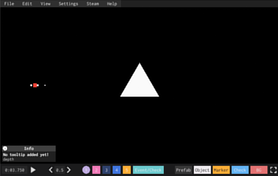
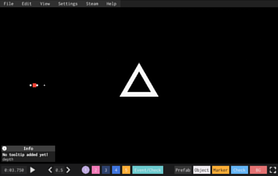
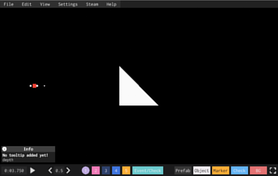
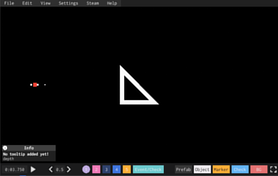
The preview window is where the level being edited can be seen. The level in the preview window is exactly the same as what will be playable in the arcade when the level is uploaded. The Player is visible and can be moved, but it will not take damage or be able to dash since pressing space pauses/unpauses the level. Pressing the window button on the bottom right of the preview window or pressing '`' will enter playtest mode, where the preview window fills up the entire screen and the player will be able to dash and take damage.
Menu bar
Menu bar is a widget which contains following menus: File, Edit, View, Settings, Steam and Help. All of them, are drop-down menus except Settings, whitch opens a Snap Settings menu.
- File
- New Level
- Open Level
- Open Level Folder
- Save
- Toggle Play Mode
- Quit to Main Menu
- Quit Game
- Edit
- Undo Change Layer
- Redo Change Layer
- View
- Show Help
- Open Lag Buster*
- Open Welcome Panel*
- Settings
- Steam
- Open Workshop
- Publish / Update Level
- Help
- Community Discord
- Watch Tutorials
- Community Guides
- Which songs can I use?
- FAQ*
*These selections are avalible on development branch
Objects
Types of Objects
- Normal - Opaque and causes damage when touched
- Helper - Transparent and does not deal damage
- Decoration - Opaque and does not deal damage
- Empty - Invisible and does not deal damage
Object Editor
The object editor is a menu that allows many features of the selected object to be edited.
- Start time - The time that the object appears. The arrows to the right of the time can be used to edit the time. The << and >> arrows move 1 second, the < and > arrows move 0.1 seconds, and the | in the middle changes the start time to the scrubber time.
- Time of Death - This is the point at which an object will disappear and not be rendered anymore.
- *No AutoKill - the object will persist even after it's last keyframe.
- Last KF - The object will die at the time of it's last keyframe.
- Last KF Offset - Similar to Last KF, but the object will die a set amount of seconds after the last keyframe.
- Fixed Time - The object will die at a set time after it is created.
- Song time - The object will die a set time in the song
*-from version 20.3.1 and on, this option is visible, but unselectable. This is due to objects with this causing lag (replaced by persistent, which creates an object with Song Time set to the end of the level). can be brought into levels via old prefabs, or modifying the metadata.
- Collapsing an object - Pressing the '...' in the Time of Death menu will collapse an object. Collapsed objects will only take up 0.4 seconds in the timeline, which can drastically reduce space for objects that exist for longer.
- Parenting - Parenting an object sets it as relative to the parent object, instead of relative to 0,0. Expanding the parenting menu will reveal 3 options, position, rotation, and scale parenting. Scale parenting is disabled by default.
- X and Y origin - Setting the origin to the left or right options will cause the objects origin point to change to that direction.
- Shape - The shape of the object
- Render Depth - Sets the render depth of the object. Objects with a higher render depth will appear over objects with lower depth.
- Editor Layer and Bin - Changes the layer and bin the object is in on the timeline.
Keyframes
Keyframes are used to change an object's position, rotation, scale, and color over time. Keyframes are placed by right clicking on an object's timeline in the object editor.
Types of Keyframes
- Position - Set the object's position to the position on the keyframe
- Rotation - Rotates the keyframe by a set amount
- Scale - Sets the size of the object.
- Color - Changes the object's color, any color on the current theme's 9 color slots are selectable
Easings
Easings are how one keyframe transitions to another.
- Linear
- Instant
- InSine
- OutSine
- InOutSine
- InElastic
- OutElastic
- InOutElastic
- InBack
- OutBack
- InOutBack
- InBounce
- OutBounce
- InOutBounce
- InQuad
- OutQuad
- InOutQuad
- InCirc
- OutCirc
- InOutCirc
- InExpo
- OutExpo
- InOutExpo
Randomization
Every keyframe on an object has a randomization type that determines if or how the keyframe will be randomized. Only position, rotation, and scale keyframes can be randomized. Color and event keyframes cannot be randomized.
- No randomization - The object will do the same action every time without any randomization. This is the default for all keyframes. The symbol for this option is an X.
- "Between" Randomization - The keyframe will pick a random value between 2 values. These values will be shown as [keyframe type] and random X/Y. A keyframes X and Y values can be randomized independently. This randomization has the option of Random Interval. Random Interval means that the values the randomizer chooses will only be in increments of the value input into the Random Interval. For example, a position keyframe with Position X of 0, Random X of 5, and Random interval of 1 can choose between the values [0,1,2,3,4,5]. The symbol for this option is 2 lines with 2 dots and a line between them
- "Choose" Randomization - The keyframe will pick one of two values. The values it chooses between are the keyframe value and the random value. The symbol for this option is 2 lines with a horizontal line between them.
- Random Scale - In Random Scale randomization, x and y values are not independently randomized. Instead, they are multiplied by a value randomly chosen between the "Random scale min" and "Random scale max" values. The symbol for this option is a triangle.
- Rotation keyframes cannot use random scale randomization.
- Rotation keyframes cannot use random scale randomization.
Events/Checks
Event keyframes are special keyframes that affect the entire level instead of one object.
- Move-- Moves the screen to a new position, default location of the screen is 0,0
- Zoom-- Zooms out the screen. The default value is 20, and the higher the value the more zoomed out the screen will be. The zoom value is the vertical height of the screen, so a level with zoom 20 will have a height of 20 units.
- Rotate-- Rotates the screen to the amount the keyframe is set to, default value is 0
- Shake-- Shakes the screen, default value is 0 and the larger the value the more intense the shaking is
- Theme-- Changes the theme of a level (the colors of the background and main objects as well as the player and GUI) there can only be 9 unique colors for each background and main object per theme
- Chromatic-- Causes the red, green and blue parts of the level to be separated, the default value is 0 and the higher the value the further away the red, green and blue colors become, this effect is relative to the center of the screen meaning in the middle of the screen the effect is less intense then in the edges of the screen
- Bloom-- Makes all objects radiate a glow, the default value is 0 and the larger the value the more intense the glow is
- Vignette-- Causes a black outline to appear around the outside of the screen, the position value dictates the position of the center of the vignette, and the intensity value dictates how strong and large the vignette is, and the smoothness value dictates how smooth the edges of the vignette are, and the roundness value dictates how circular the center of the vignette is, all of these values are defaulted at 0
- Lens-- Makes the objects on the screen curve as if the screen was a lens, the default value is 0
- Grain-- Creates static on the screen, the size of the grains is how big the grains of static are and the intensity is how many grains there are, both of these values are defaulted at 0
- Checkpoint-- Creates a checkpoint that when a player dies they will respawn in the inputted location at the time of the checkpoint providing they have gotten to that checkpoint before, the default location is 0,0
Prefabs
- Prefabs are groups of objects compressed into a single slot on the timeline.
- When you create a prefab, it can be added to and used in any level, not just the one you create it in.
- Once placed, a prefab can be expanded into the objects that it is made up of. You can edit the prefab objects and then collapse it, which will apply your changes to all instances of the prefab across all levels.
- Prefabs can be used to create an attack (for example, a laser with a random position) that can be easily copied and pasted across a level multiple times, with easy access to editing all of the times the attack was used at once.
- Prefabs are also commonly used to copy and paste arrangements of objects (for example, a boss character model) between levels.
- There are 8 selectable categories for prefabs. These have no effect on the prefab itself and are only for organizational purposes.
- Bombs
- Bullets
- Beams
- Spinners
- Pulses
- Characters
- 4 Miscellaneous categories ("Misc" 1-4)
BG Objects
BG Objects are a type of object different from normal objects. BG Objects cannot move and exist in 3D behind the rest of the level. BG Objects use their own color palette separate from normal objects.
Depth
The depth of a BG Object determines how far away it is from the level. BG Objects with lower depth are farther away.
Position, Scale, Rotation, and Color
These act the same as for normal objects, except they are not determined by keyframes and cannot change over the course of the level.
Reactive Config
Reactive config is used to make BG Objects grow and shrink along with the music automatically. BG Objects can react to Bass, Mids, or Treble with the intensity of the size change determined by the slider below these options.
Fade
If this option is enabled, then the BG Object will stretch into the background, with its color changing to the first color slot in the BG Object palette as it fades.
BG Objects are stated by the developer to be removed in a future update. They will be replaced by static objects, which are more similar to normal objects.
Hotkeys
| New Level | Ctrl+N |
| Open Level | Ctrl+O |
| Save Level | Ctrl+S |
| Toggle Play Mode | ~ |
| Undo Change Layer | Ctrl+Z |
| Redo Change Layer | Ctrl+Y |
| Cut | Ctrl+X |
| Copy | Ctrl+C |
| Paste | Ctrl+V |
| Duplicate | Ctrl+D |
| Delete | Delete |
| Zoom Out | Ctrl+-
Pad - Scroll Down |
| Zoom In | Ctrl+=
Pad + Scroll Up |
| Toggle Grid | Ctrl+' |
| Toggle Help | Ctrl+H |
| Small Jump Left | Left Arrow |
| Small Jump Right | Right Arrow |
| Large Jump Left | Ctrl+Left Arrow |
| Large Jump Right | Ctrl+Right Arrow |
| Pitch Up | Up Arrow |
| Pitch Down | Down Arrow |
| Multi Select | Hold Shift |
| Go To Current Time | Shift+Home |
| Go To Start | Home |
| Go To End | End |
| Expand Prefab | Ctrl+E |
| Quick Create Prefab | Ctrl+P |
| Lock Object | Ctrl+L |
| Layer 1 | Ctrl+1 |
| Layer 2 | Ctrl+2 |
| Layer 3 | Ctrl+3 |
| Layer 4 | Ctrl+4 |
| Layer 5 | Ctrl+5 |
| Event Layer | Ctrl+6 |
| Create Marker | Ctrl+M
Pad , |
| First Keyframe | Ctrl+, |
| Last Keyframe | Ctrl+. |
| Back Keyframe | , |
| Forward Keyframe | . |
| Refresh Object | Ctrl+R
F5 |
| Quick Prefab | / |
BPM Snap
BPM (Beats Per Minute) snap is a feature in the Project Arrhythmia editor that can be accessed by going to Settings. There you will see a menu with a button labeled Toggle, and a slider labeled BPM with a number input area set on the right of it. The features purpose is to help organize levels by having the rate at which objects and event keyframes are placed synced with the BPM of the song. If the song is 120 BPM, and the BPM snap feature is toggled on, the objects will snap to every 120th of a minute of a song. This is very useful for object organization in modelling, and syncing normal attacks to the song better.

